If your water heater is starting to show signs of age, then it may be time for a replacement. For instance, the average water heater typically has a lifespan of about 10 years; so if your unit is nearing that mark, then it is probably time for an upgrade. At the very least it should be time for an inspection so you can gauge just how long you have until the unit begins to fail. When it comes to getting a new water heater, replacing a water heater is a fairly straightforward process and with the right professionals, the job can be completed in just a few hours.
Contact a Professional
When it comes time to replace your water heater, you will need to schedule an initial appointment with a water heater company, someone like Mr. Waterheater, so that they can speak with you about all of your options. While you can simply replace the existing water heater with a similar model, many homeowners prefer to upgrade to a high-efficiency unit. During your first appointment, a team member will go over all of the different options and help you find a water heater that meets all of your requirements. They’ll also be able to provide you with an estimate of how long the replacement process will take and how much it should cost you.
Disassembly and Removal
On the day of the project, the plumber or water heater company you hired is going to clear the area around the original water heater before disconnecting the water and power. They will also need to drain all of the water out of the tank so that the device is easier to remove and prevent a flood in your garage, basement, or wherever the water heater is stored in the house. Once the tank is empty, they can disconnect all of the lines and remove the original water heater from your property. In most cases, the company will remove and dispose of the original water heater for a minimal charge. This process is simple and straightforward, and it should not take more than a few hours to complete.
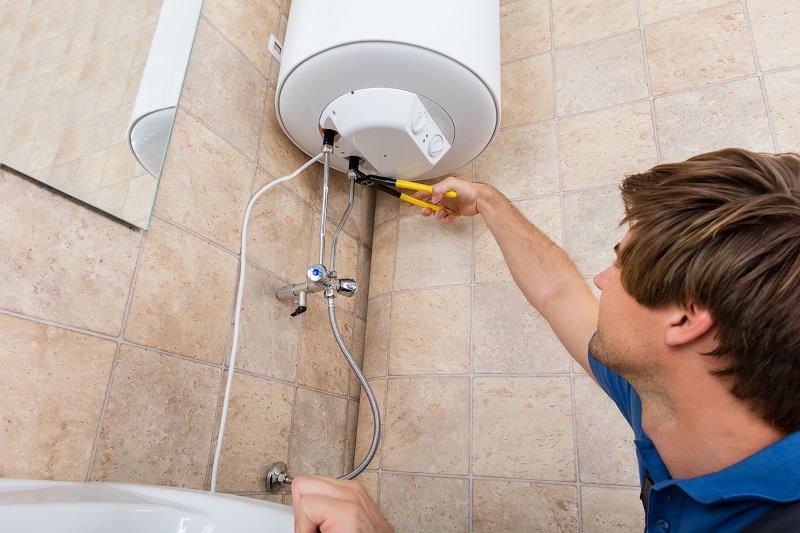
Installing the New Water Heater
The installation process for a new water heater is slightly different depending on the model, the house, and where it’s being installed, but this project usually follows the same general steps. Your plumbing team will begin by hooking up the new water heater to all of the existing lines, and that includes connections for the water as well as the gas or electricity. They might also need to make some minor adjustments to those lines so that the water heater assembly meets all code requirements.
Testing All Connections
Once all of the connections have been made and secured, it is time to test them before turning on the unit. This can be done by checking for any thermal expansion that may have occurred. If there is no expansion, then the next step is to turn on the unit for a short period of time to ensure that the tank heats up properly. If everything appears to be working correctly, the team can then adjust the water heater so that it brings the water up to your preferred temperature. By taking these steps, you can be sure that your new water heater will be installed properly and ready to use.
After your new water heater is in place, you are probably going to notice the benefits right away. Modern water heaters are more efficient than ever, and that device should last you for many years as long as you keep it well-maintained. The biggest benefit you’ll likely notice is the cost savings on your energy bill each month. New water heaters are designed to use less energy while still providing an adequate supply of hot water for your needs. You may also find that the new water heater delivers hot water more quickly than your old one did. This can be a real convenience if you’re used to waiting a long time for hot water to reach your faucet or shower. In general, a new water heater should provide you with years of trouble-free service. However, it’s important to follow the manufacturer’s recommended maintenance schedule to ensure optimal performance and longevity.